- Home
- Virtual Workflow
- Using Hubdoc to Upload Bank CSV Files to QBO
Learning QuickBooks® Online | Focus on Bookkeeping Workflow
 Using Hubdoc to Upload Bank CSV Files to QBO
Hubdoc - QBO Data Integration
by Rachel Fisch CPB
(Guest Author from QB-HQ)
Article reprinted with permission
Published January 2017 | Edited June 15, 2024
WHAT'S IN THIS ARTICLE
Introduction | Upload Bank CSV Files to QBO | Upload Bank CSV to QBO Bank Feed | Map to QBO COA | Upload to QBO Bank Feed | Other Workflow Chats
As many of you know, Hubdoc is one of my must-have accounting apps for any client using any accounting software. The powerful fetch function allows me to work more independently instead of nagging my clients and waiting for copies of bank statements, online-accessible invoices as well as transactions imported through a number of methods including mobile app and email-in.
But that’s not where the fun stops. Not only does Hubdoc fetch statements, but also copies of e-transfers, cheque copies and CSV files. These CSV files come in handy when you are not able to connect a bank feed to QuickBooks Online (QBO). But there are a few tricks to making these work efficiently. (For the following examples, keep in mind that I don’t know if some of these situations are specific to this bank, QBO or PC vs Mac.)
Chat Continues Below Advertisement
Using Hubdoc to Upload Bank CSV Files to QBO
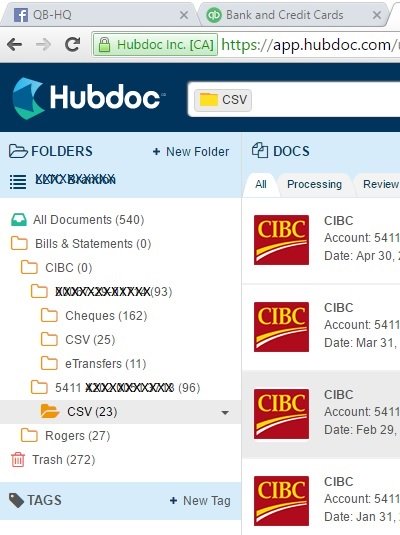 Hubdoc data integration with QBO bank feed
You can find the CSV files on the left side of the Hubdoc login beneath the accounts they are associated with. In this case, one CSV file belongs to a chequing account, the other belongs to a credit card account. To access the CSV files, simply click on the CSV folder you would like to access.
From the CSV folder, select the file you wish to download and select the Download button from the top right of the screen. Notice how the date format appears YYYY-MM-DD.
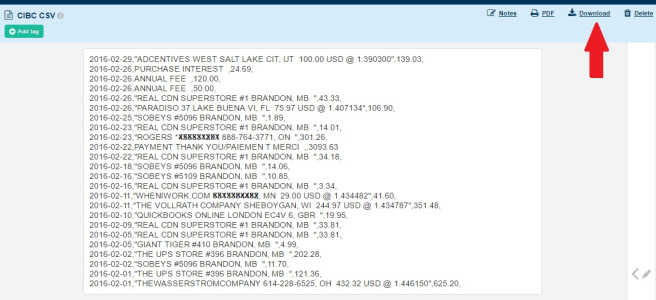 Download bank CSV file
You will need to open the CSV file to adjust the date format before uploading into QBO’s bank feed. To do that, I use the drop down arrow to the right of the download file and select Open. The CSV file will open in Excel.
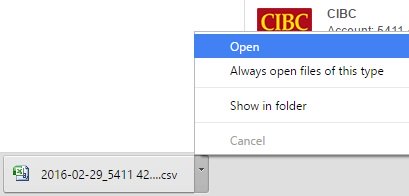 Adjust the date format before uploading to QBO bank feed.
From the Office button, select Save As then scroll down to Other Formats. I like to change the name of file so it is easy to find later, but remember that it must always stay a CSV file format in order for the upload to work in QBO. Also notice that the date format has changed now that it is viewable in Excel and pay attention to the columns here and what data is in each column. Here we have date, description, credits (for credit card payments) and debits (credit card charges).
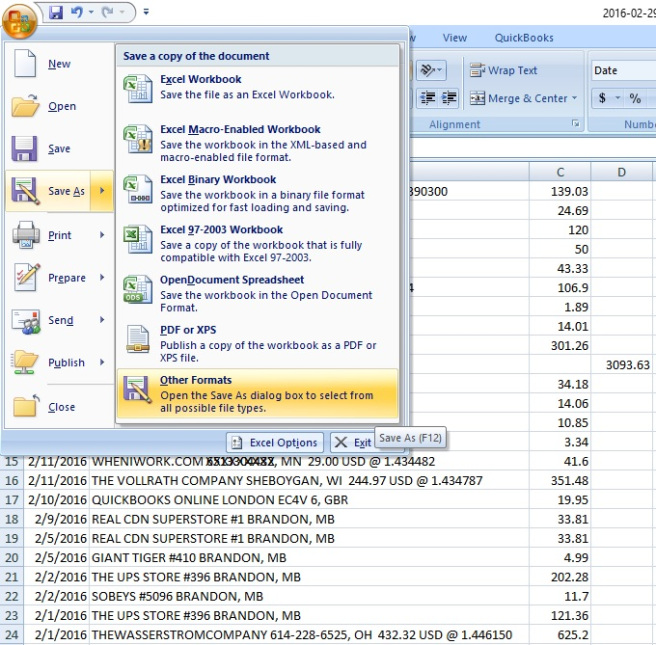 Rename the CSV file.
Chat Continues Below Advertisement
Upload the Bank CSV File to QBO Bank Feed
You are now able to upload the file into QBO. From the navigation pane, select Transactions then Banking. Select the account you wish to upload the file for. You can see the account selected here is CIBC MasterCard. On the right side, use the drop down arrow beside Update and select File upload.
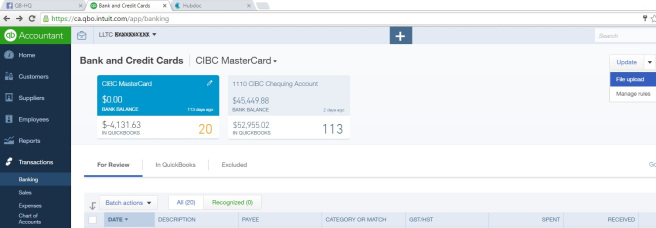 Upload the CSV file to QBO.
Select the file to upload and select Open. Once the file has been confirmed as selected, click Next at the bottom right.
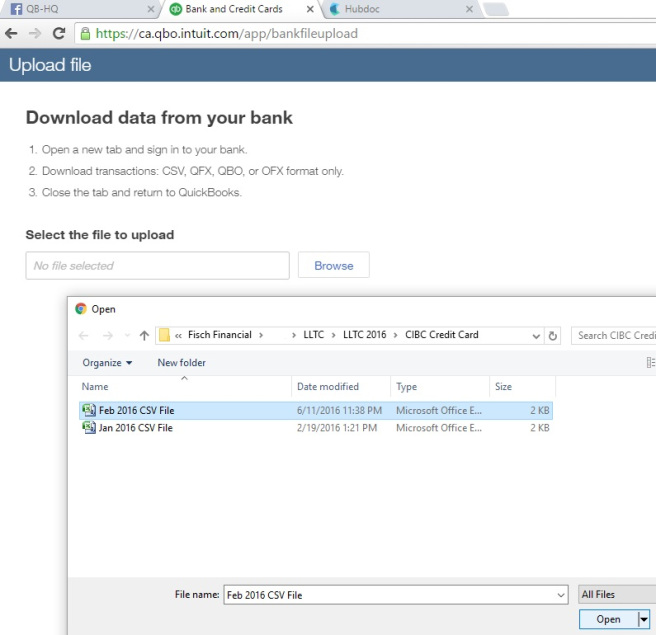 Upload bank data file.
Map Your File to QBO Chart of Accounts
Now map the file you just uploaded, to the account you want to compare it to in the Chart of Accounts. Then select Next at the bottom right.
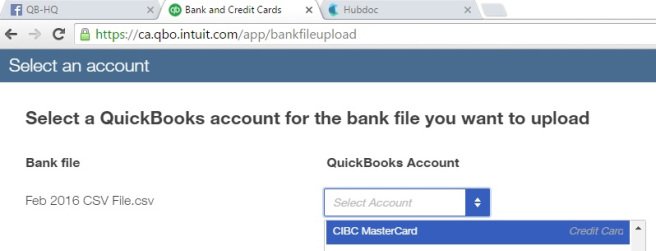 Map your bank data to QBO chart of accounts.
By using the drop down arrows, select the options to map the information correctly from CSV to QBO. However, the trouble comes when you go to select the date format. There are only three date formats given as options. None are based on the company file’s date format, and all three are a variation of “day, month, year” which the CSV file does not come in natively. To correct this, simply go back to the Excel file and change the date format to match the one you want to select in the file upload screen. I find it most effective to go straight to Custom date format as there aren’t any that match the default options in QBO. Then click OK.
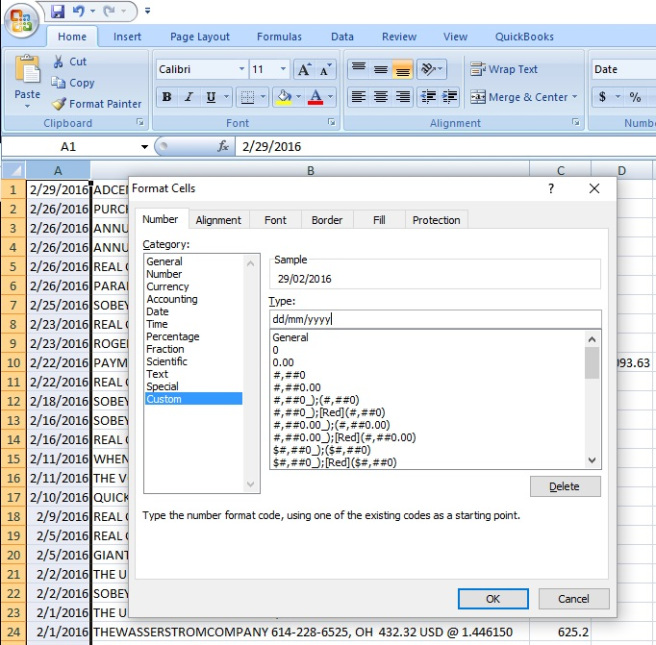 Get the QBO date in the proper format.
When you re-save the file, ensure you keep the CSV file format. Now that you know you need to change the date format, you can do it when you save the file the first time and before you upload it to begin with. You are now ready to upload the file (or re-upload it, if you forgot to change the date format first), and map it to the bank feed.
Upload to QBO Bank Feed
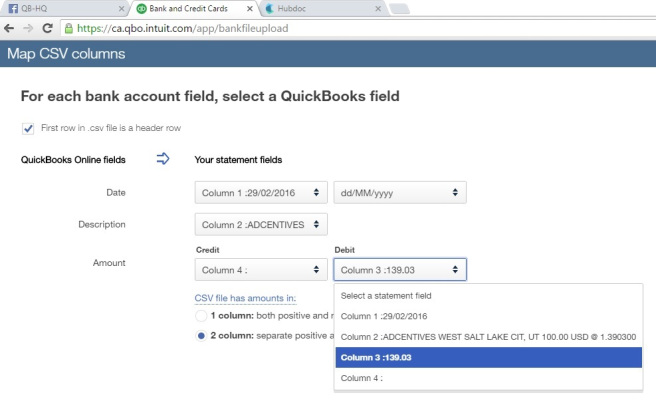 Keep bank file as a CSV file.
Select Next in the bottom right corner. You will then be prompted to select which transactions that have been downloaded, you want to import. In most cases, it will be all of them. But this is a good spot to remove transactions for date ranges already reconciled. If you miss those at this step, don’t worry, you can always exclude the transactions within the bank feed later. Follow the prompts to complete the upload process.
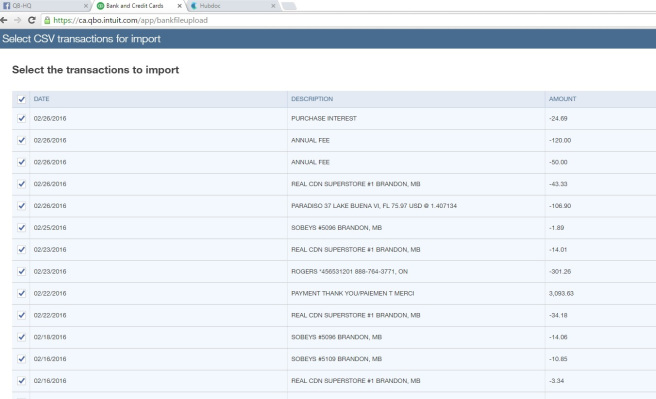 Import bank transactions to QBO bank feed.
Once uploaded, the transactions will appear in the bank feed centre, and you will be able to add, match or even create and apply bank rules on them just as you do with transactions brought through a connected bank feed. It is a great alternative for Hubdoc clients who don’t want or can’t have direct access to their online banking through bank feeds.
 Data is now in your QBO bank feed.
 Rachel Fisch founder QB-HQ
About the Author:
Rachel Fisch is the founder of QB-HQ. Rachel has trained thousands of QuickBooks ProAdvisors and Users in hundreds of training sessions across Canada and beyond in both QuickBooks Desktop and Online since 2012.
QBO Workflow App Integration Chats
Click on any image below to go to the chat.
© 2015 Google Inc, used with permission. Chrome™ browser and the Chrome™ browser logo are registered trademarks of Google Inc. Screen shots © 2015 Google Inc. All rights reserved.
QuickBooks® is a registered trademark of Intuit Inc. Screen shots © Intuit Inc. All rights reserved. Hubdoc is a trademark of Hubdoc Inc. Screen shots © Hubdoc Inc. All rights reserved. LedgerDocs is a trademark of LedgersOnline Inc. Screen shots © LedgersOnline Inc. All rights reserved. Ablii is a trademark of nanopay Corporation © All rights reserved. Plooto is a trademark of Plooto Inc. Screen shots © Plooto Inc. All rights reserved. LedgerSync is a trademark of LedgerSync, LLC. Screen shots © LedgerSync, LLC. All rights reserved.
